






In brief
ViPlex Express is NovaStar's player software for Taurus media players. It plays content without a permanently connected PC: connect the player, import media, build a playlist, define a schedule and publish the programmes to the player. Playback then runs independently on the media player.

Overview
A running playlist in 5 steps
Quick overview – details for each step can be expanded.
| Step | Area | What happens |
|---|---|---|
| 1 | Installation | Download and install ViPlex Express. |
| 2 | Connect | Connect the media player via Wi-Fi, LAN cable, or USB. |
| 3 | Log in | Access the player (e.g. Taurus TB50). |
| 4 | Create a solution | Build a playlist with images, videos, and texts. |
| 5 | Publish | Send the playlist to the player and play it. |
Basics
What is ViPlex Express?
Free PC software from Novastar for creating and distributing content on LED media players.
- Async mode: content is transferred to the player (Taurus) and stored there – playback without a PC. This guide.
- Studio mode: the PC outputs the image live – NovaLCT is usually better suited for this.
- PC with Windows 10 or newer
- ViPlex Express installed (download below)
- Novastar media player, e.g. Taurus TB50
- Connection via Wi-Fi, LAN cable, or USB
- Your content: images, videos, or texts
Step 1
01Install ViPlex Express
- Open the Novastar download page
- Tab “Nova Cloud” → “Nova Cloud Software”
- Install the latest version of ViPlex Express (incl. additional components)
- Confirm the firewall prompt with Allow
In detail: Where exactly is ViPlex on the Novastar site?
On the official download page, select the “Nova Cloud” tab at the top, then the item “Nova Cloud Software” – ViPlex Express is available for download there. Install the complete package with all additional components; if the Windows firewall does not allow access, the player will not be found on the network.
Latest version from the official Novastar site – tab “Nova Cloud” → “Nova Cloud Software”. For the Taurus series, select async mode.
Go to Novastar downloadsStep 2
02Connect the media player
Without a connection, the device list remains empty.
- Wi-Fi: connect the PC to the player’s “AP…” network
- LAN cable: directly or via router/switch
- USB cable: directly to the PC
In detail: Wi-Fi connection step by step
- Open the Wi-Fi list on the PC.
- Select the player’s network – the name usually starts with AP + serial number.
- Enter the Wi-Fi password (see the password note in step 3).
The Taurus can also be integrated into your existing Wi-Fi (STA mode) – PC and player are then on the same network. For initial setup, the direct AP connection is easiest.
In detail: LAN & USB
LAN: network cable to the player’s gigabit port – stable even over longer distances, ideal for permanent installations. USB: direct connection to the PC, convenient at the desk before installation.
Step 3
03Access the media player
All discovered players appear in the Screens area with name, IP, and resolution.
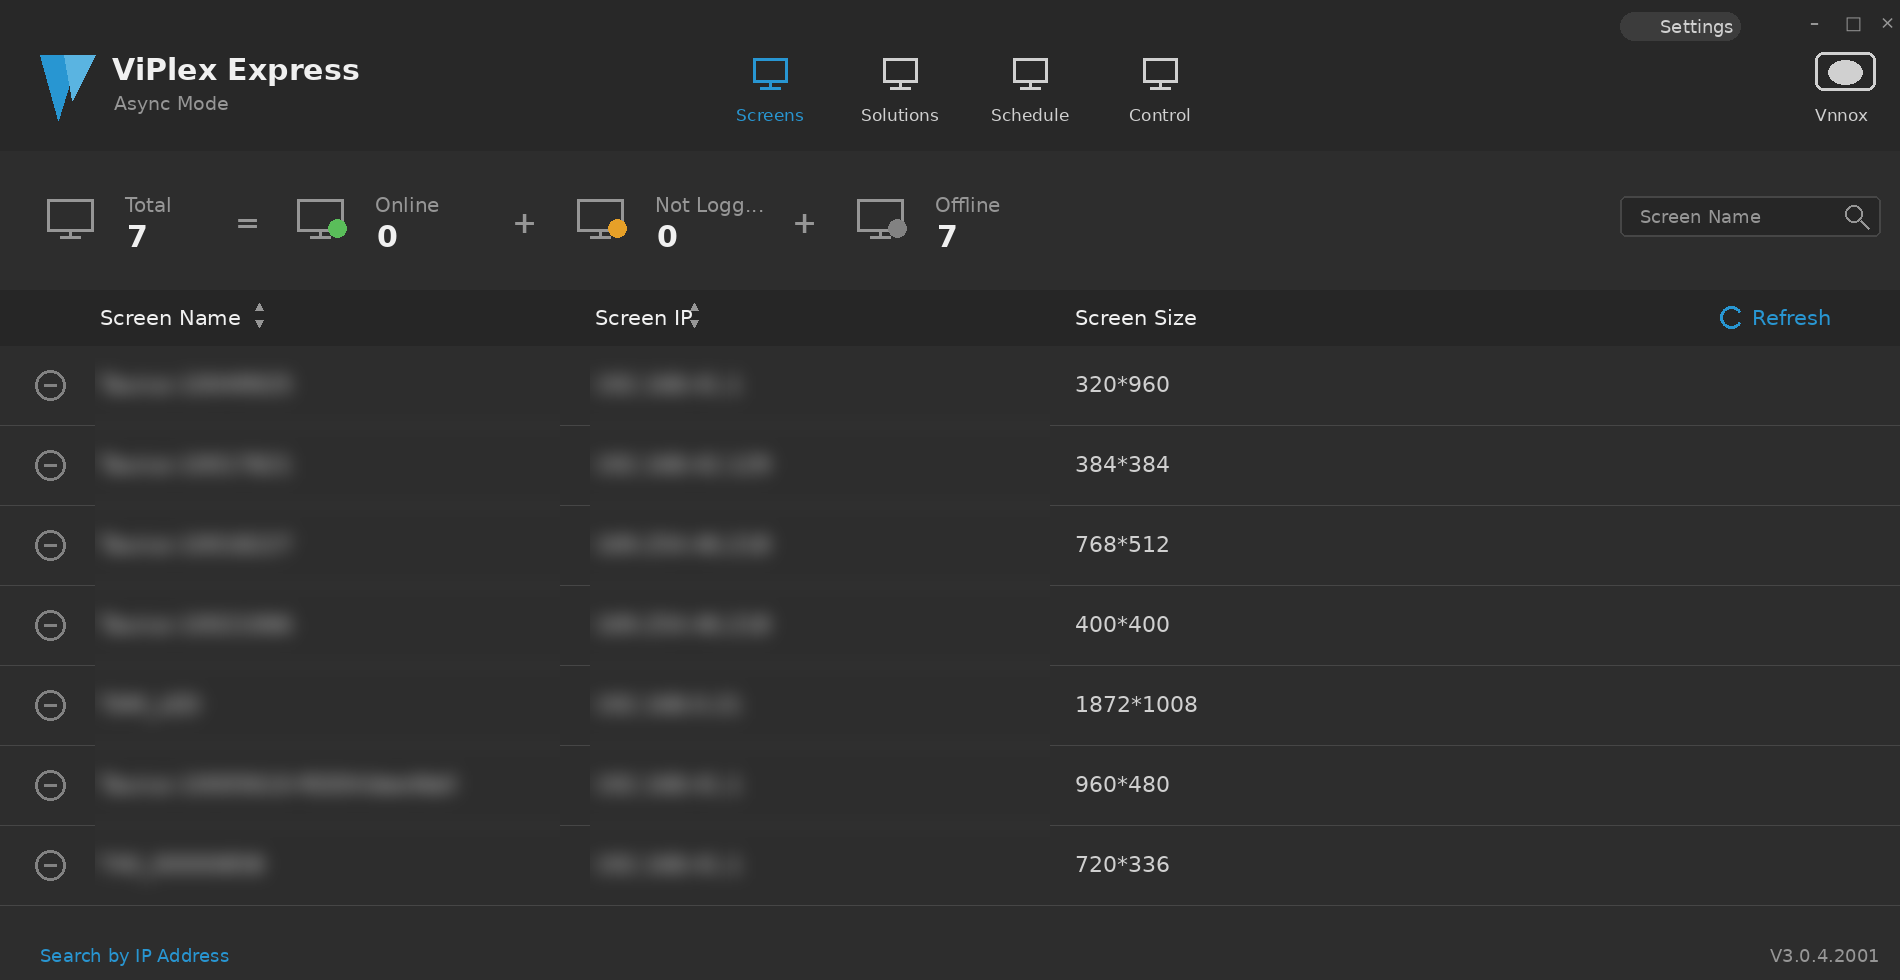
- Select the player (e.g. Taurus TB50) → Connect
- Enter the device password
- Status “online” = connected
In detail: Passwords (device, Wi-Fi, login)
The device passwords are usually admin and 123456. For many devices, an individual combination from the sticker on the device applies – often in the format SN2008@+ or similar. The same password usually also serves as the player’s Wi-Fi password and as the login password in ViPlex – but may differ in individual cases.
Tip: note down the combination during commissioning and change it for permanently installed systems for security reasons.
Step 4
04Create a solution (playlist)
A “solution” is your playlist of images, videos, and texts.
- Solutions → New, assign a name
- Resolution = pixel size of your wall (e.g. 768×384)
- Add media, set the display duration for each element
In detail: Content, windows & layout
- Drag a media element (image, video, text, clock, weather) onto the workspace.
- Select a file from the PC.
- Set the display duration per element.
- Add further elements – they run in sequence and repeat automatically.
Using multiple windows, the area can be divided, e.g. video at the top, ticker text at the bottom. Content in the correct size (matching the resolution) looks sharpest – pixel for pixel.
Step 5
05Publish & play
- Save the solution → Publish
- Select the player as the target, confirm
- The playlist then runs independently – even without a PC
In detail: Further standard functions
- Brightness: manually, via schedule, or via light sensor (brighter by day, darker at night).
- On/off times: switch the wall on/off automatically (save energy).
- Schedule/calendar: different playlists at fixed times/weekdays.
- Screenshot: remotely check what the wall is showing.
- Volume: for players with audio output.
- Time/time zone: synchronise the player clock with the PC – important for schedules.
Frequently asked questions
FAQ
ViPlex Express cannot find my media player?
- Player switched on and connected via Wi-Fi/LAN/USB?
- With Wi-Fi: is the PC really connected to the player’s “AP…” network?
- Check antivirus software/firewall.
- Restart ViPlex, refresh the device list.
- Briefly restart the player.
Which password do I need for the player?
Usually admin and 123456, or the combination from the sticker on the device (format such as SN2008@+). Usually also the Wi-Fi and login password – may differ in individual cases.
Difference between ViPlex Express and NovaLCT?
ViPlex Express: asynchronous media players (Taurus), playlists without a PC. NovaLCT: screen setup via sending/receiving cards (synchronous). For Taurus + playlists: ViPlex Express.
Does the playlist also run without a PC?
Yes. After publishing, the solution is stored on the player and runs independently.
Which resolution do I enter for the solution?
The pixel size of your wall (width × height). It is stated in your project documents; if in doubt, WALED will provide the exact value.
Can I change content without a PC?
Yes, with the free app ViPlex Handy (Android/iOS) directly from your smartphone.
Frequently asked questions – ViPlex Express – Players & Playlists
Do I need a permanently connected PC for my LED wall?
No. With a NovaStar Taurus media player and ViPlex Express, content is published once and then runs independently on the player. The PC is only needed to load new content and to change the playlist or schedule.
How do I load new content onto my LED wall?
In ViPlex Express you connect to the Taurus player, import the media files, arrange them in a playlist, add a schedule if required and publish the programme to the player. Playback then starts automatically.
Can I schedule content playback?
Yes. ViPlex Express lets you attach schedules to programmes so that different content runs at different times of day or on specific weekdays. This is the basis for DOOH advertising surfaces with changing bookings.
Which media formats does ViPlex Express support?
ViPlex Express handles the common image and video formats as well as text elements and web content. Which formats a specific Taurus player processes and at what resolution depends on the model – the differences between TB10 Plus, TB20 Plus, TB30, TB50 and TB60 are set out in the WALED Taurus series overview.
Consulting and planning by WALED
WALED VIDEOWALLS GmbH, based in Duisburg, develops, supplies and installs LED video walls for fixed installation and rental – indoor and outdoor, throughout Germany. As a manufacturer for fixed installation and rental with 25 years of experience we plan your system from requirements analysis and 3D planning through to commissioning and maintenance. Reach us on +49 (0) 172 2844494 or via the contact form. Find the right configuration in minutes with the LED wall configurator.